Table of Contents
This article explains how to enable self-enrollment in user groups. It allows users to enroll themselves into groups without a user group manager’s manual approval.
Enabling self-enrollment in user groups #
To allow a student to self-enroll in the user groups, a group manager needs to enable the self-enrollment option as follows:
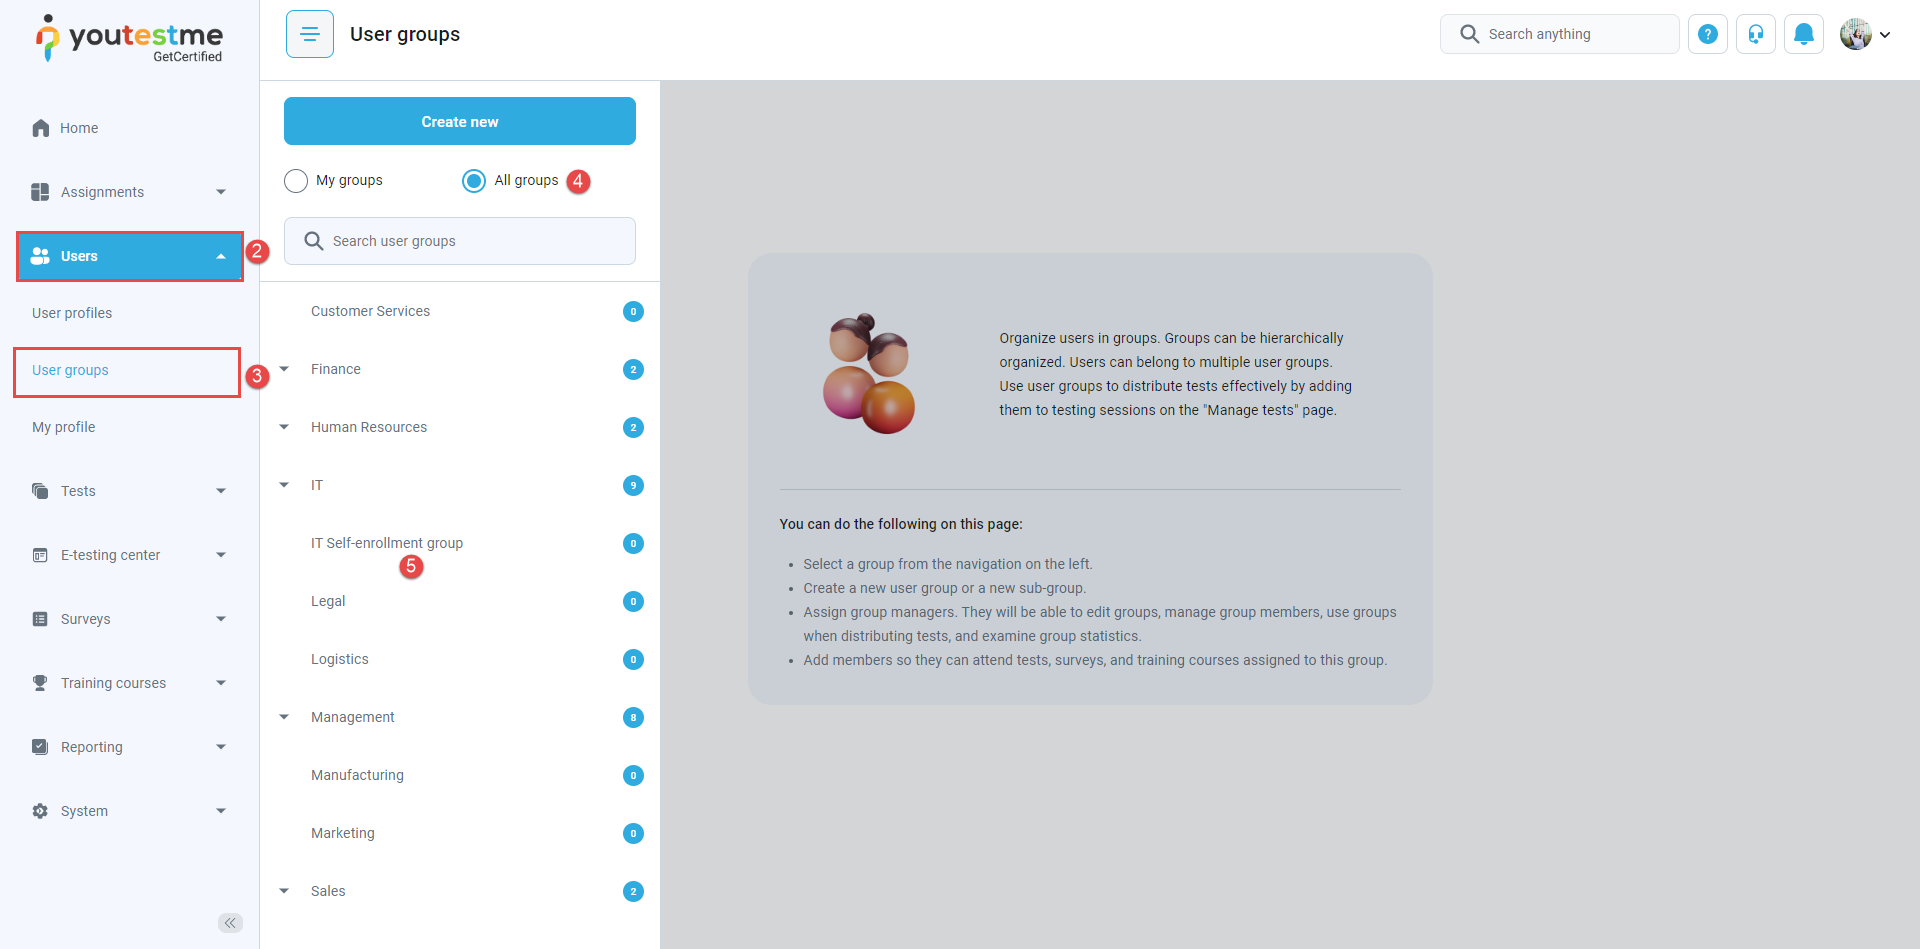
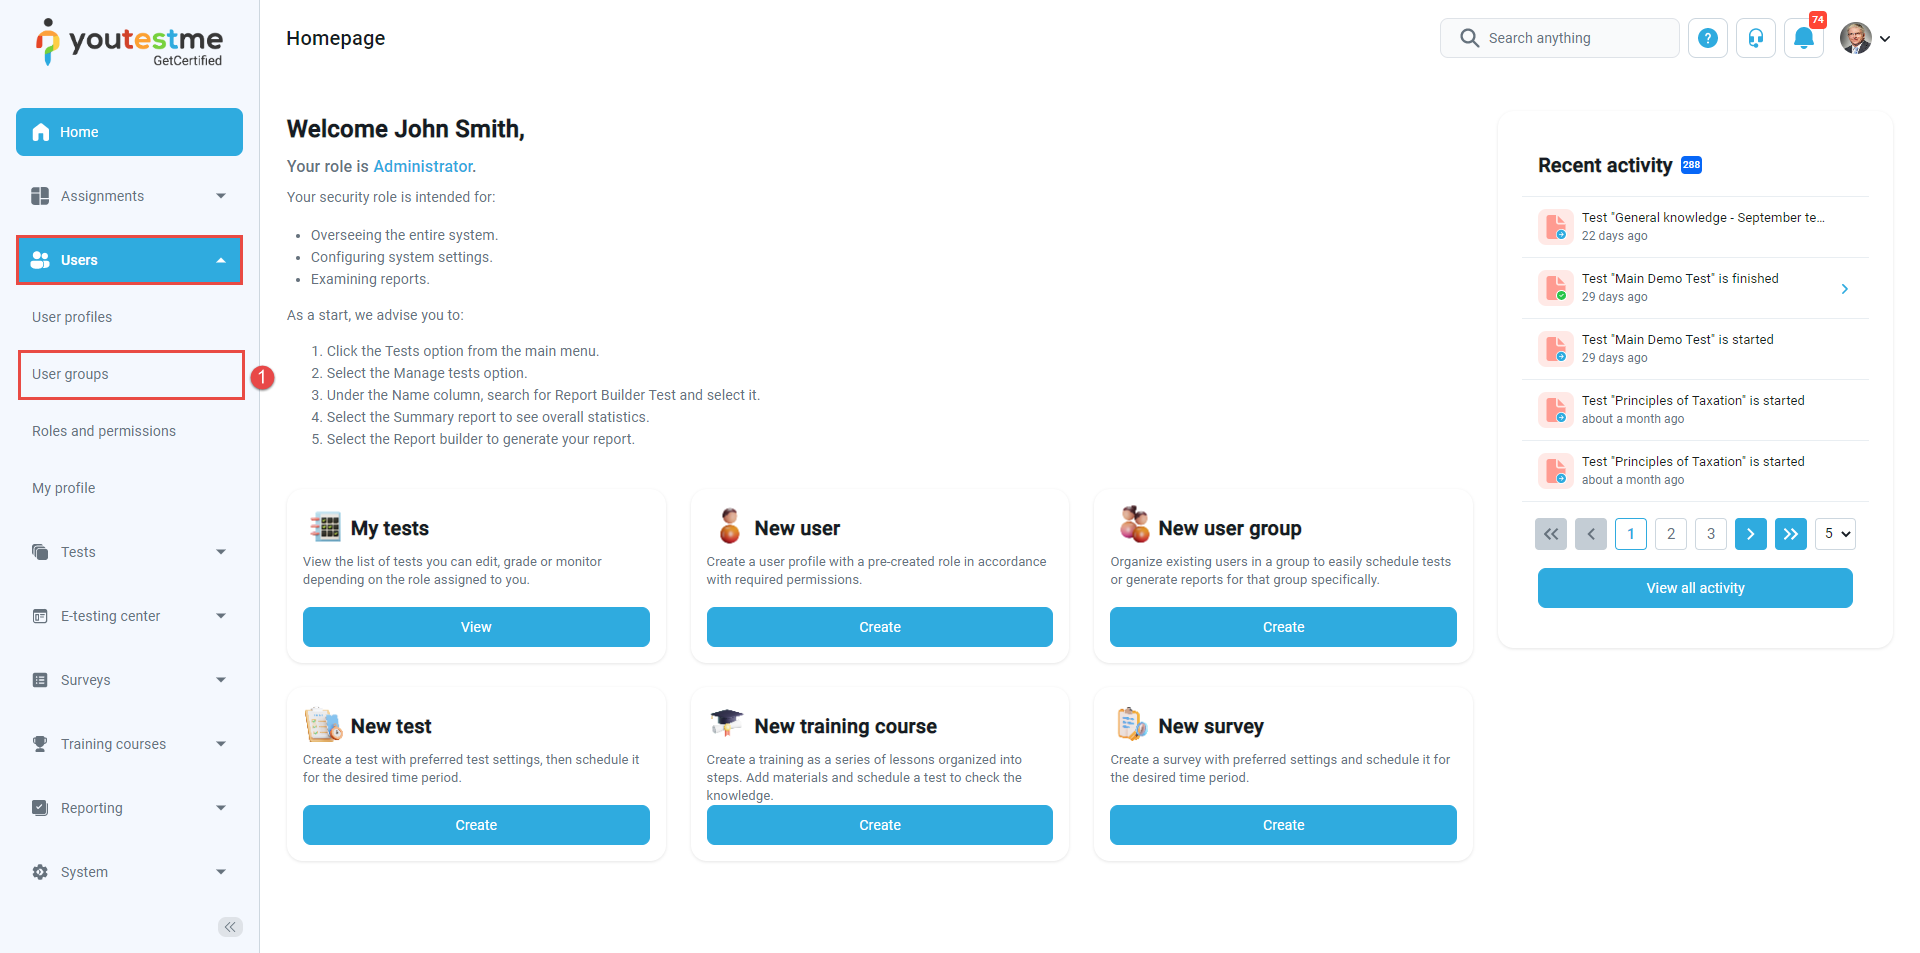
- Hover over the Users tab in the main menu and select User groups.

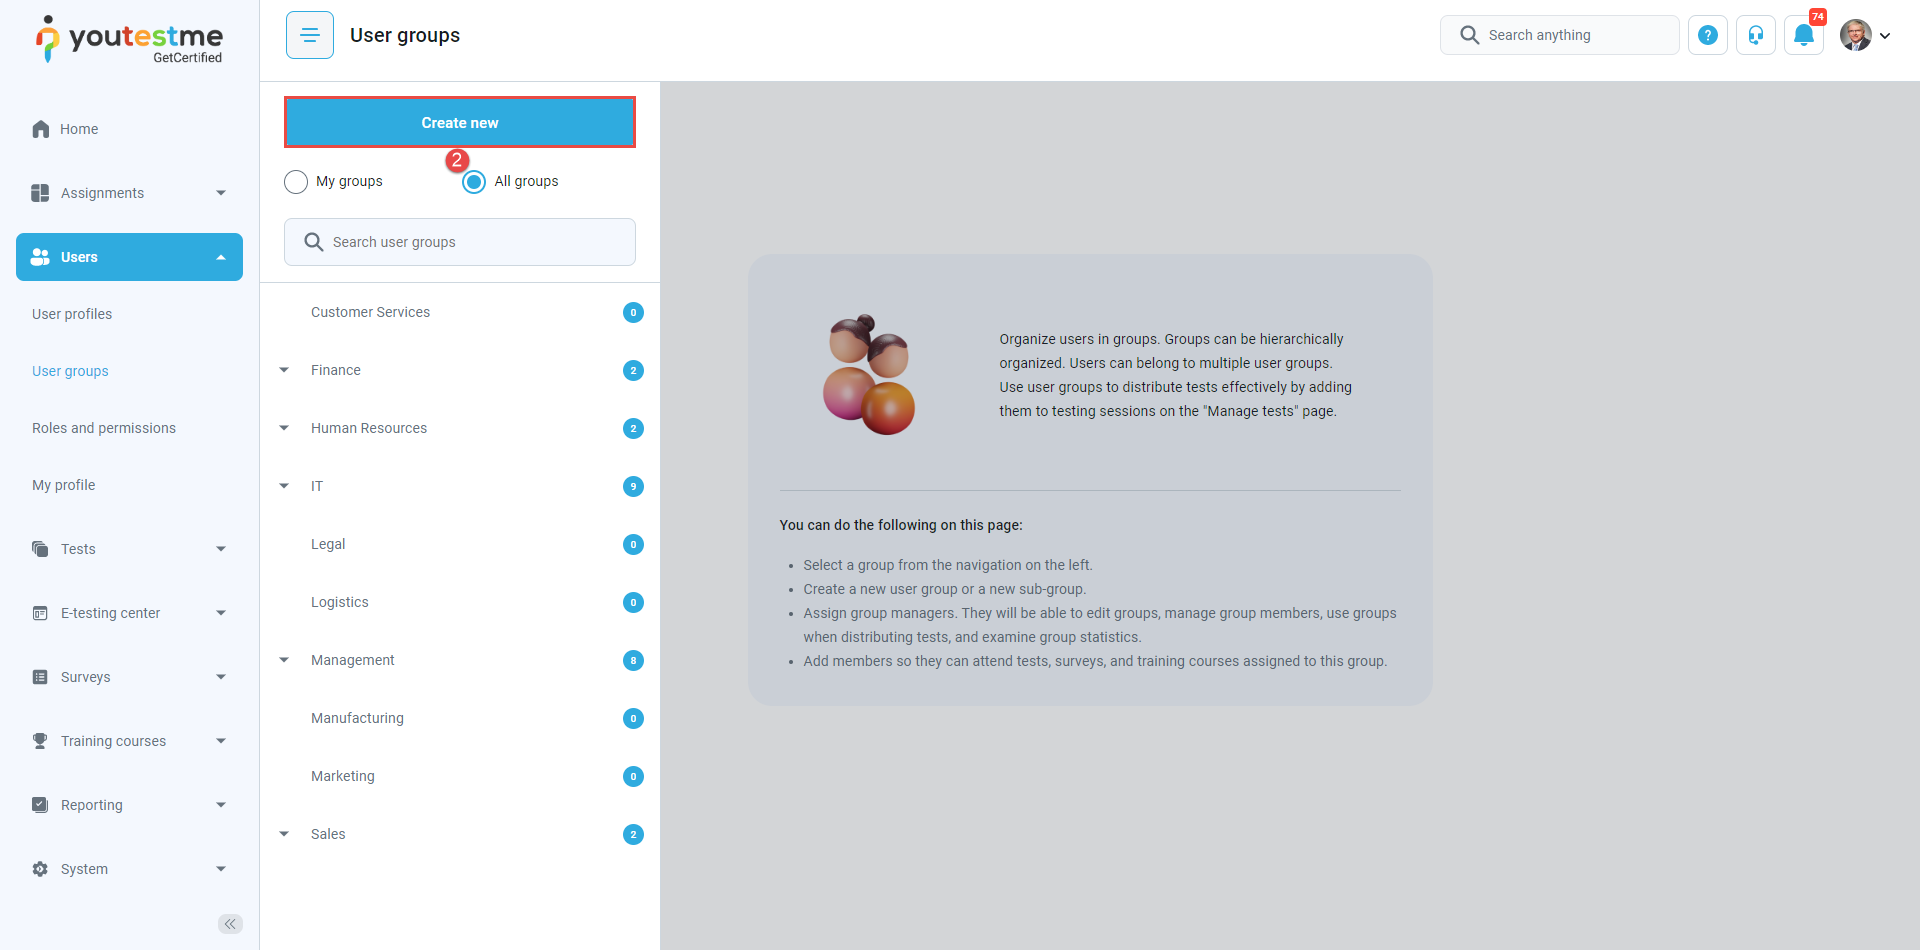
- Click the Create new button to create a new user group.

Then:
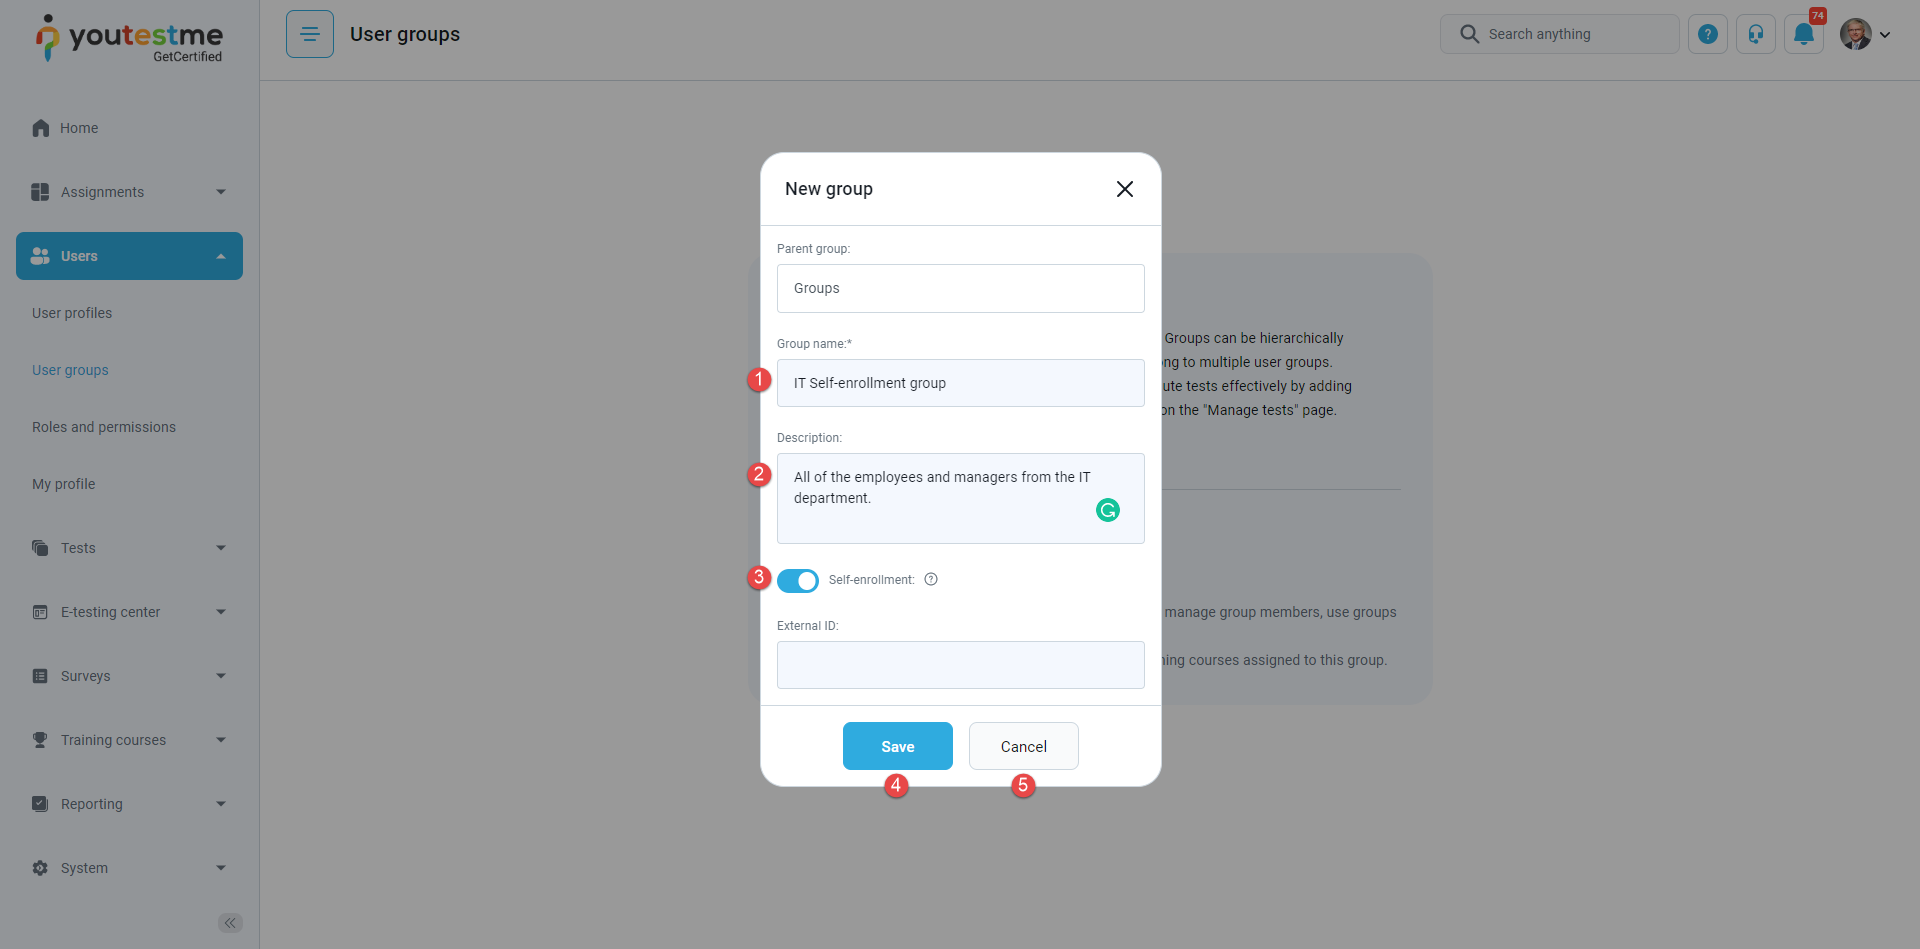
- Enter the group name.
- Enter description.
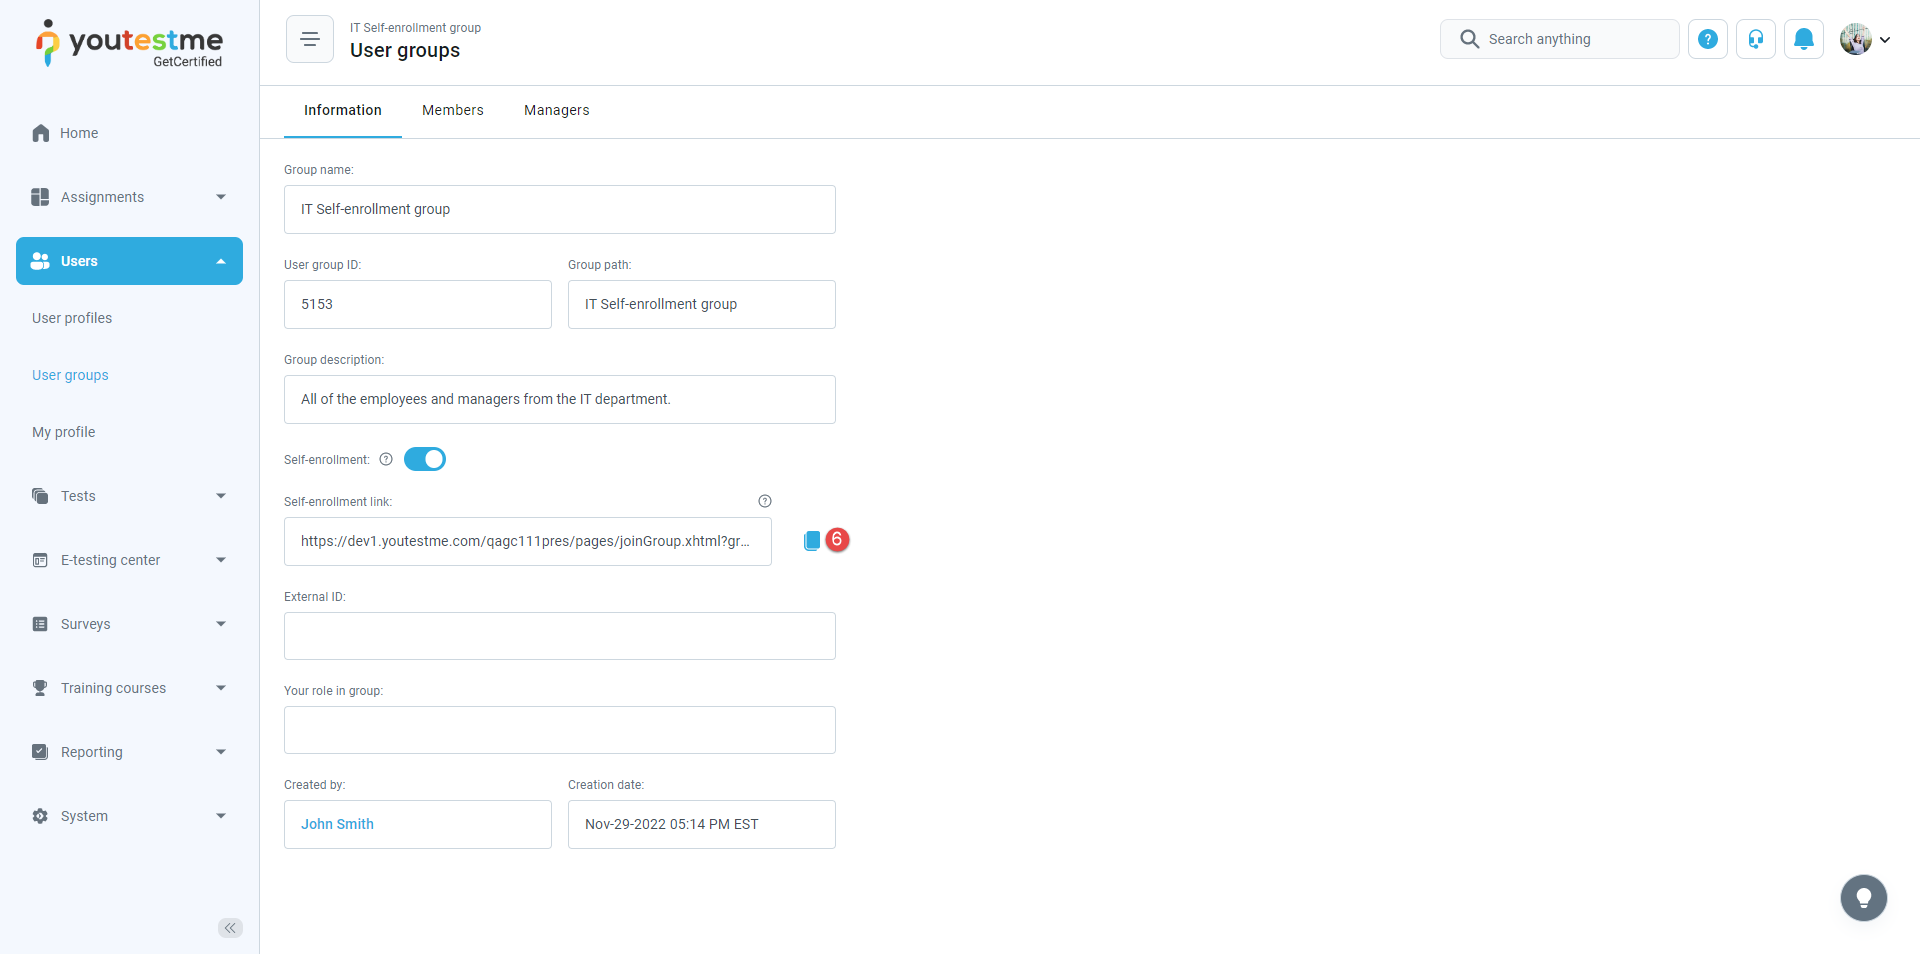
- Click the toggle button to enable self-enrollment.
- Click the Save button to create a user group.
- Click the Cancel button to discard the user group creation.

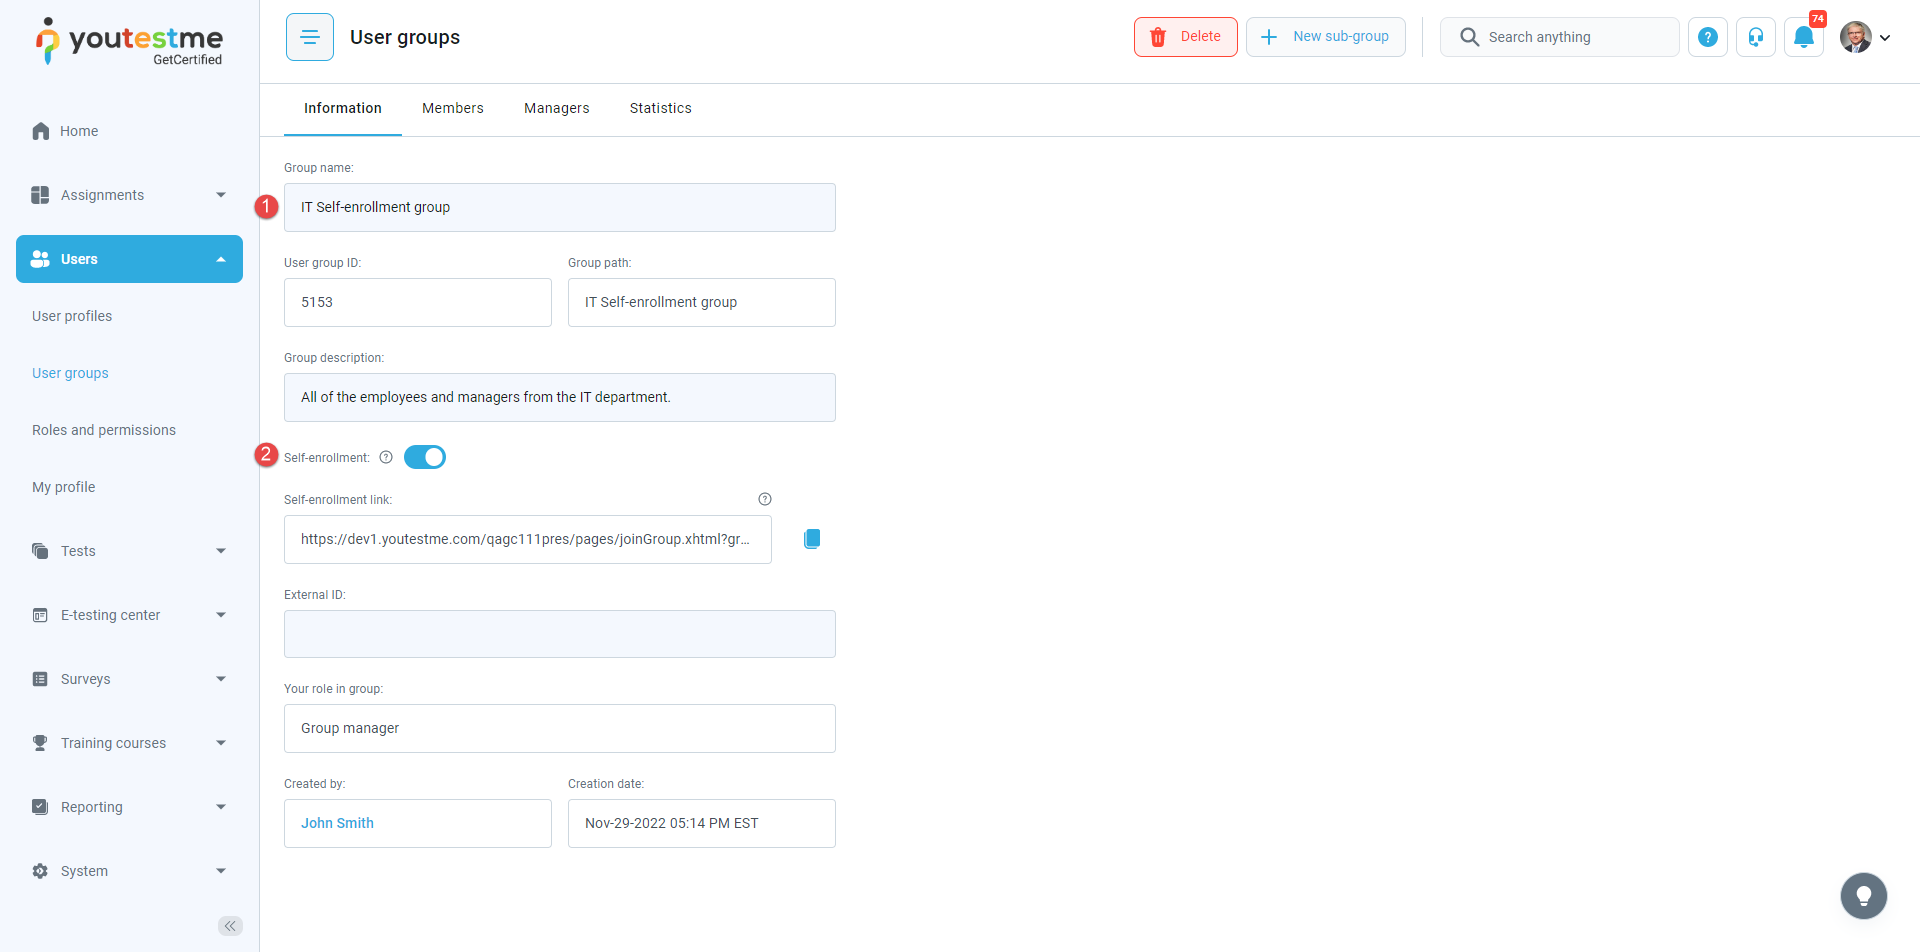
You can also enable the self-enrollment option for the existing user groups.
- Choose the desired user group.
- Click the toggle button to enable self-enrollment.

Joining the user group using the self-enrollment option
To join a user group, a user should:
- Open the profile page.
- Select the Users tab.
- Select the User groups tab.
- Choose All groups.
- Click on the group you want to be a member of.
- Copy the link to the self-enrollment group.

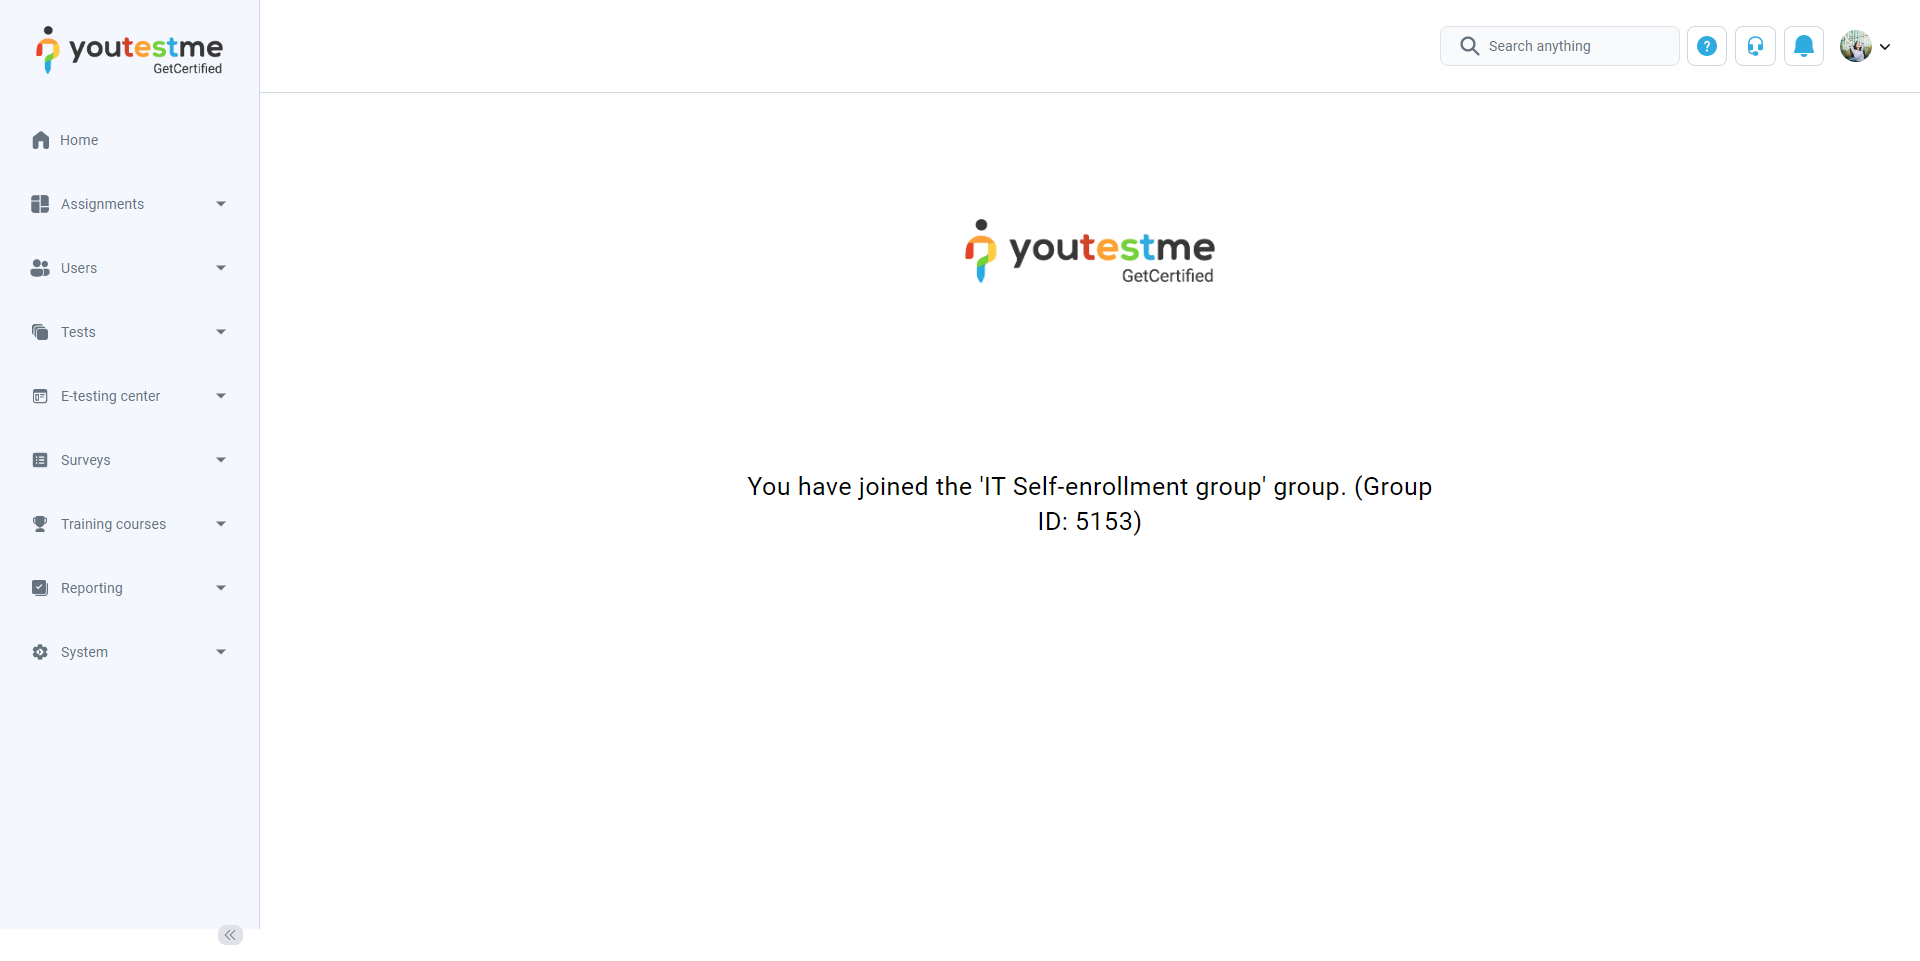
- Paste the link in the new tab in the address bar. After clicking on Enter, you will be shown that you successfully became a member of the desired group.