This article explains how to craft custom forms for registration or exam session bookings. YouTestMe allows users to create custom forms with fields and conditions for registration and test reservations, and assign them to specific users.
Creating a Custom Form #
To create a custom form, follow these steps:
- From the main menu, go to Users.
- Choose Custom forms.
- Click the Create new button.

- When the new form section appears, enter the name of the form.
- Optionally, provide a description for the form.
- Choose the form type: Registration type (employed during user registration) or Booking type (designed to collect the necessary information just before test booking).
- To add a form field, click the Create new button in the top right corner of the Form elements table.

In the pop-up window, follow these steps to configure the form element:
- Enter the Label for the element; this is the element’s name in the form.
- Optionally, provide a Description for the element, which will appear as a tooltip next to the label.
- Choose the element type from the following options:
-
- Text: Allows users to enter any text, optionally with a regular expression requirement.
- Number: Permits only numerical input.
- Date: Enables users to select a date.
- Date and time: Allows users to choose both a date and time.
- Time: Permits the selection of a specific time.
- Drop-down: Offers a list of values for the user to choose from; you must specify the options for this type.
- Define the source type for the element, specifying where the offered values come from:
-
- Simple: Custom options can be defined in the Options field.
- User groups: Options are based on user groups in the system, potentially subject to conditions.
- Users: Options are based on all users in the system, potentially subject to conditions.
- Gender: Options are limited to gender choices.
- Indicate if the element is required; marking it as such means the user must complete it to submit the form.
- Specify whether the element is shown by default; marking it as Yes ensures it appears on the form, No means it will only be displayed under specific conditions.
- Determine if the element is disabled by default, meaning it cannot be edited. Setting it to Yes prevents users from entering data unless conditions change this property.
- Define the element’s position on the form.
- When the form is submitted, the selected user field in the user’s profile will be updated with this element’s value. When the form is opened for submission, this element’s value will be pre-filled with the current value of the user profile field it updates.
- Save the element properties by clicking the Save button or cancel the changes by clicking Cancel.

Repeat these steps to add more fields to the custom form. You can also add Form Conditions which are used to change default element properties (i.e., required, shown, etc.) based on input to an element of the form. A form condition includes a condition and an action to be executed if the condition is satisfied. For example, if one element is not shown by default, you can define a form condition that sets the element to show if some other element’s value is set. To add a form condition, do the following:
- Click the Create New button in the Form Conditions table.

- In the pop-up window for condition definition, enter the Name of the condition.
- Choose the condition position. Condition positions determine the order in which the algorithm processes conditions after every change to form fields when the form is filled out. Conditions are executed in the order of their defined positions, and their actions are carried out if the conditions are satisfied. The position is vital because an action from one condition may influence whether a subsequent condition (with a higher position) is met.
- Define the condition using group and simple filters. The options are similar to those for creating form element conditions, but note the differences:
- Instead of specifying particular element properties, you choose one of the form elements.
- You do not need to specify values for certain criteria (e.g., set, required).
- Specify the actions to be executed if the conditions are met. Add an action by clicking the Add Action button.
- Choose the form element on which the action will be executed.
- Select the action itself.
- Save the condition by clicking the Save button or cancel the process by clicking Cancel.

After defining the form elements and conditions, use the Save button to include the new custom form in the list of custom forms.

The newly created form will initially be saved as a draft. To make it available for use, you should publish it. Once published, you can submit it to the desired users.
Note: A draft form can be modified or deleted, but it cannot be used. After publishing, the form has the status Published. A published form can be used but cannot be edited or deleted. Once published, a form cannot be brought back to the Draft status.
Publishing and Assigning a Custom Form #
To publish and assign the custom form to users, please follow these instructions:
- Click the three-dot menu and select Publish.

Once the form is published, click the three-dot menu and select Submissions.

Click the Assign Users button.
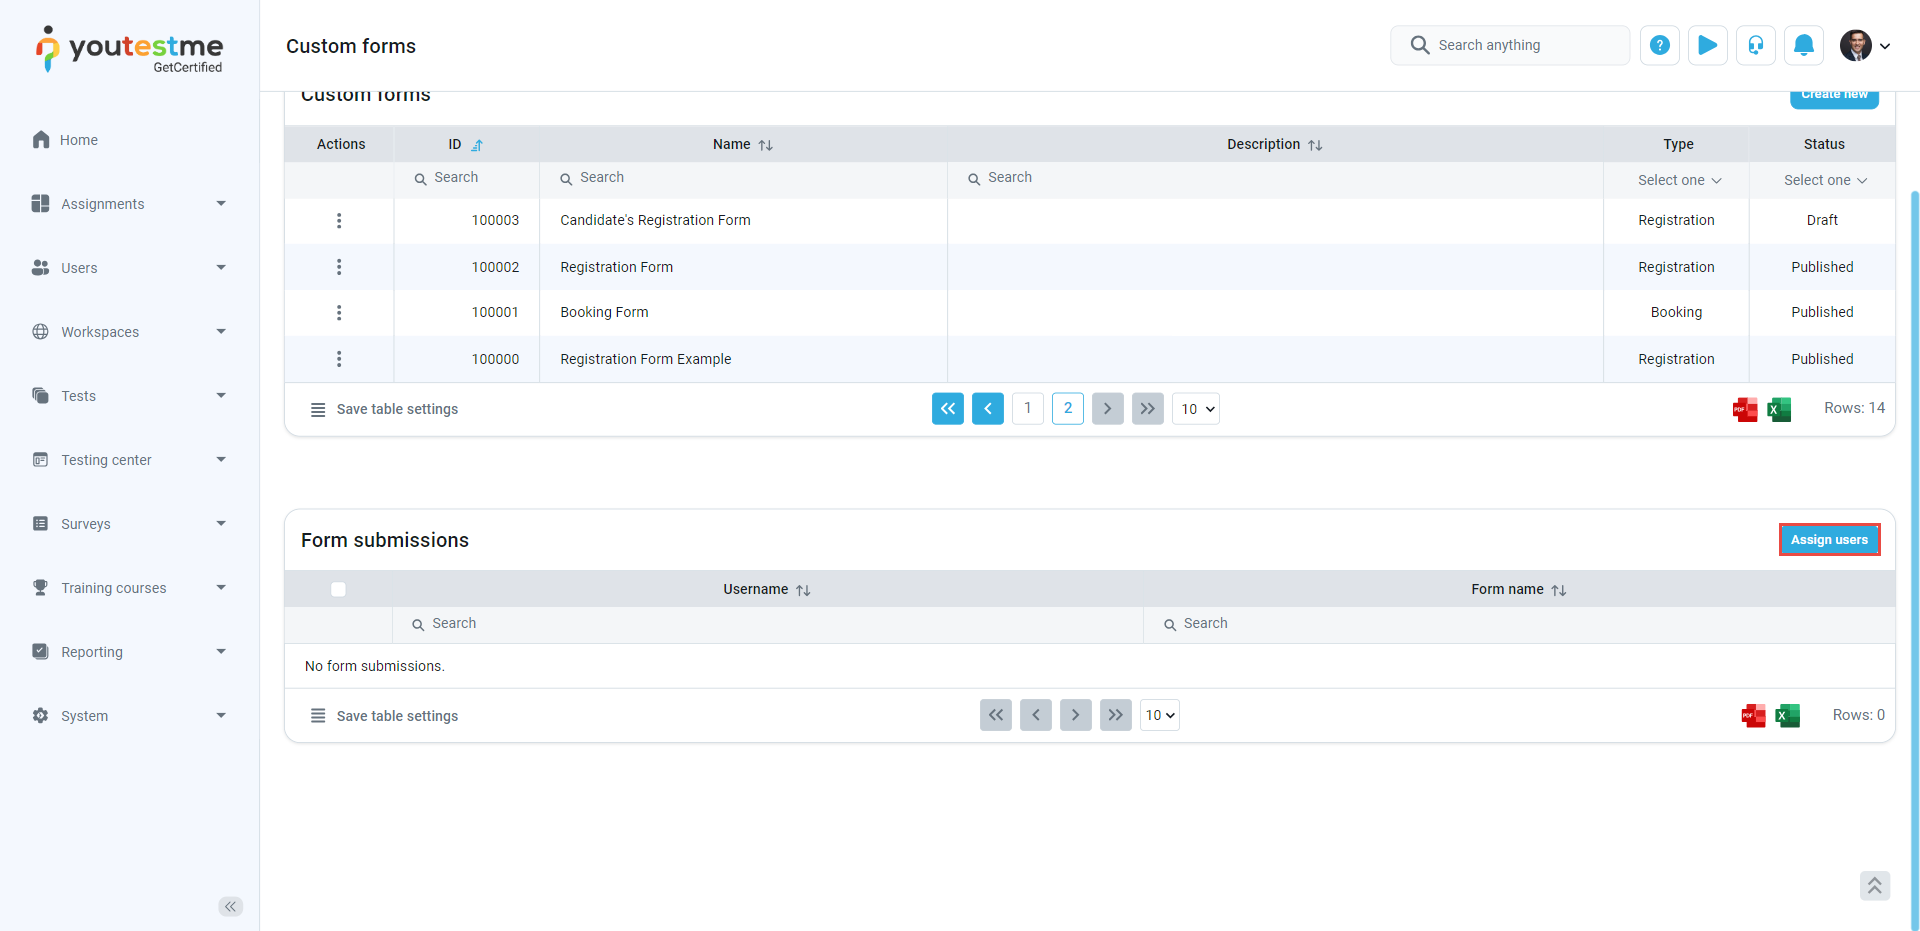
Select the users who should complete the created form and click the Confirm button.

Incorporating Custom Forms in Registration Links #
You can incorporate the custom forms you’ve created into the registration links configuration. By using this link, new users will be directed to the registration page, where they will be prompted to complete the custom form. In the registration link configuration window, select the desired form and click the save button. For more detailed steps on how to create and use a Registration link, read this article.

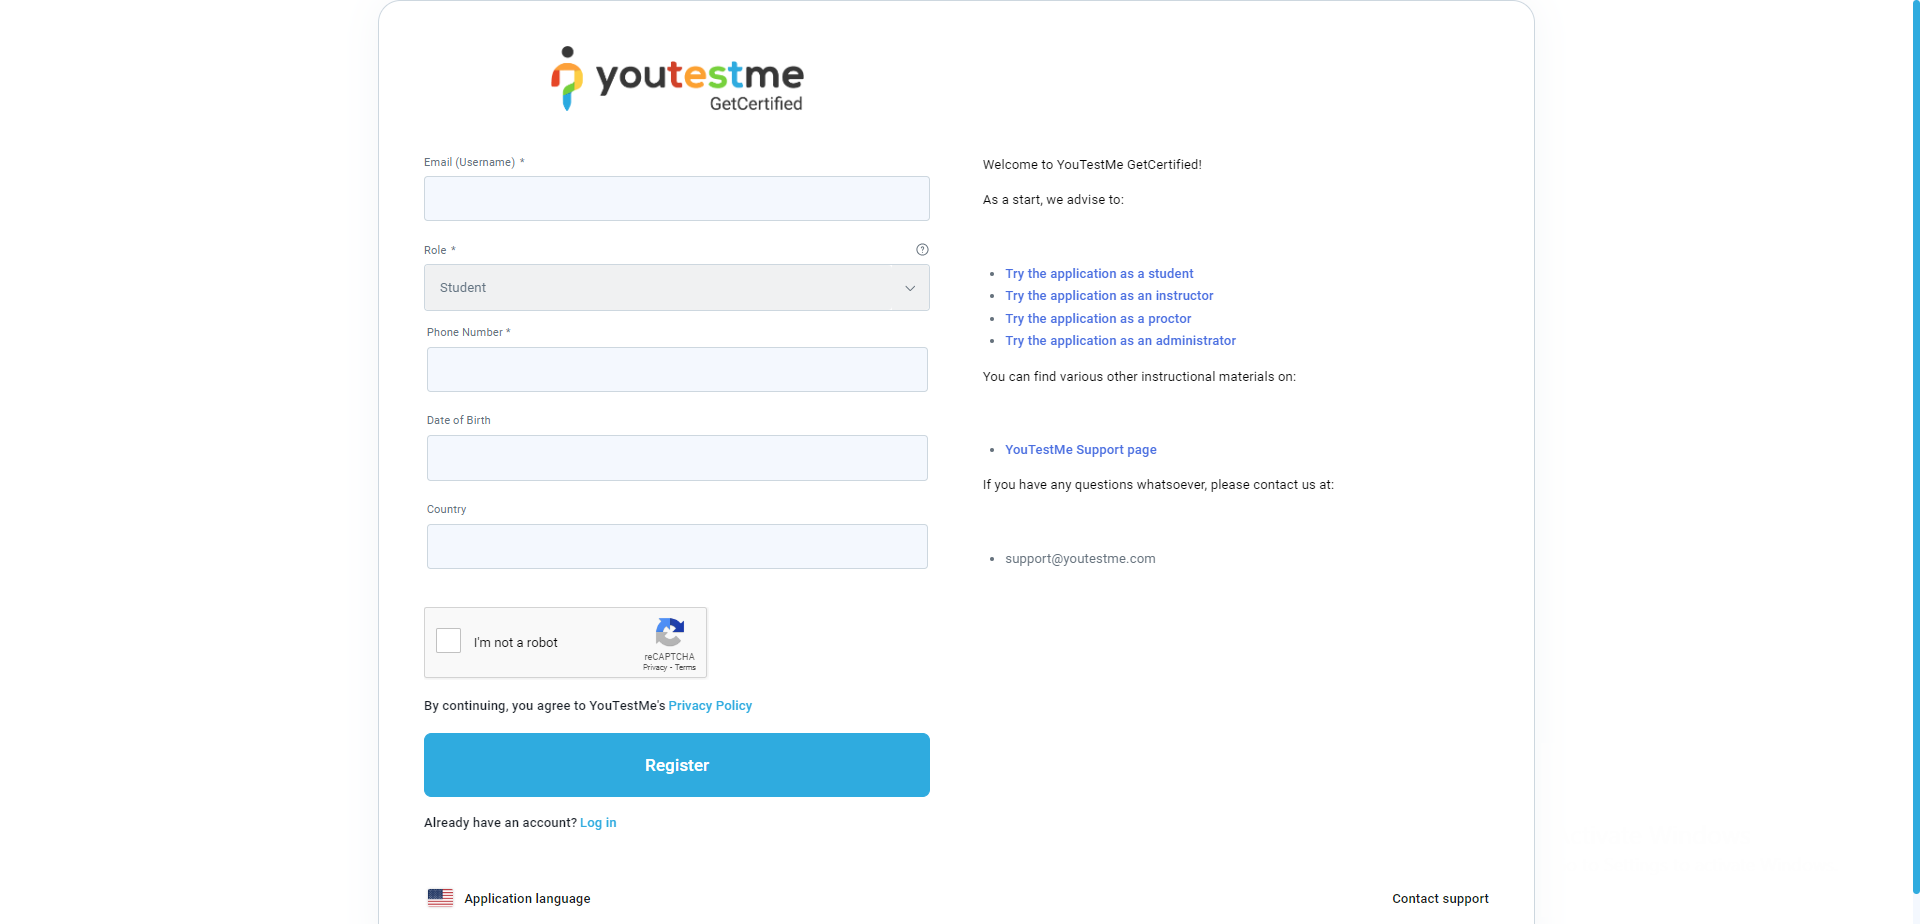
Candidate’s perspective of the Registration form #
Candidates who click the registration link will be redirected to a screen with the submit form.
Creating a session that requires completing a Booking Form #
By following the instructions provided above, you can create a custom booking form that will be presented to users when they schedule an exam session.
To configure a session that requires completing a custom form for booking an exam, please navigate to the specific test within the Manage Tests module and follow these instructions:
- In the New Testing Session window, input the session details and activate the Self-enrollment option.
- Choose the pre-created custom booking form under the booking settings.
- Click the Save button.

Candidate’s perspective of the booking form #
When candidates visit the My Test page, exams that require form submission will display a Submit Form button instead of a Start or Book button.
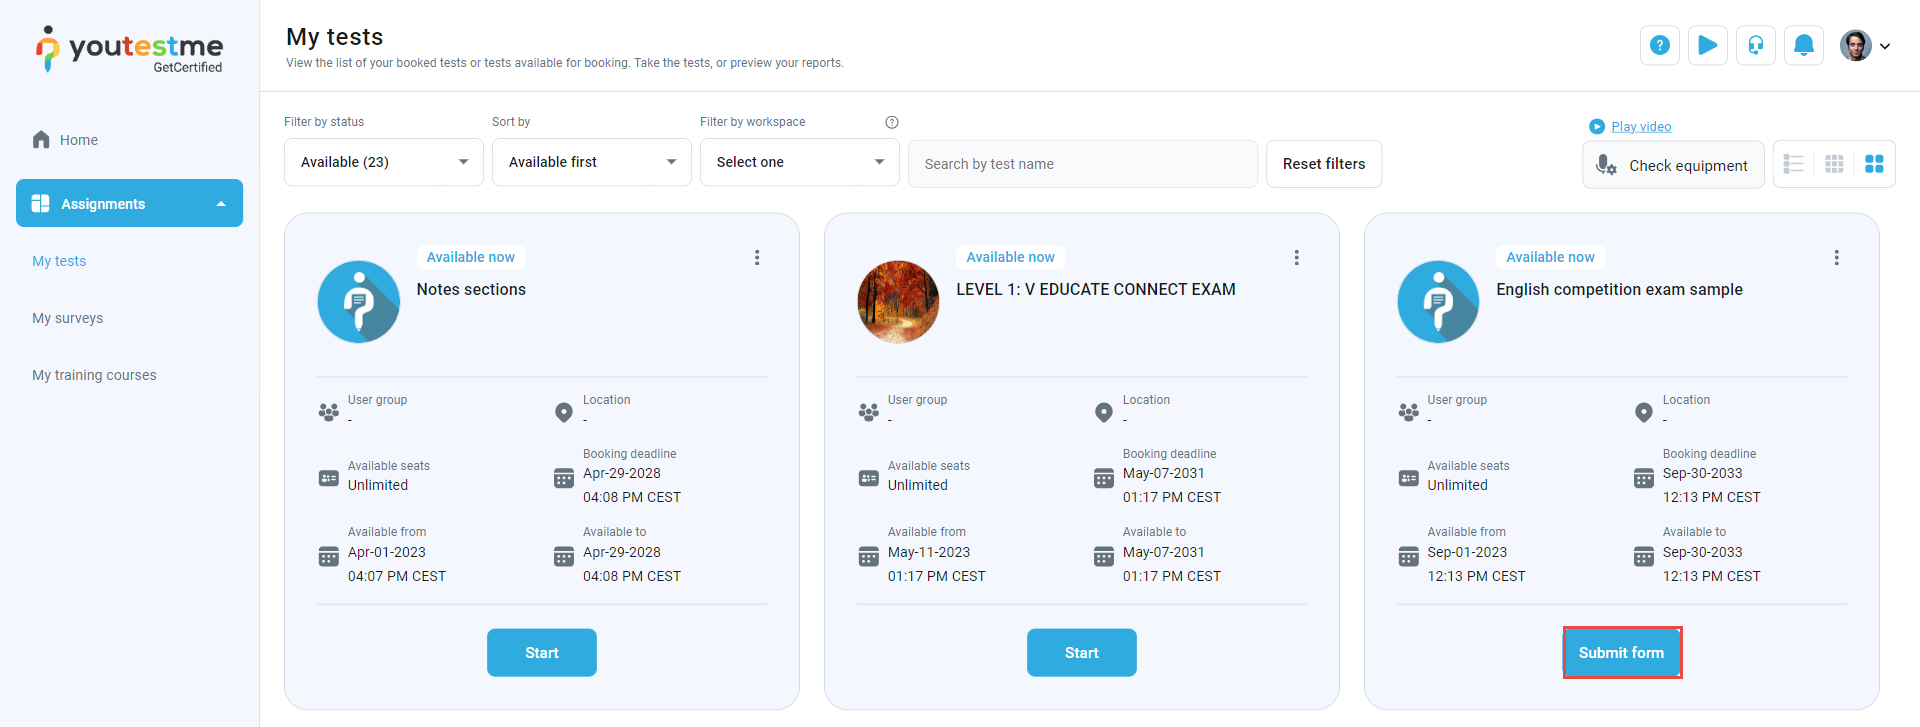
To commence the exam, candidates should click on the Submit Form button and complete the mandatory fields.


