This article provides details about the REST API for YouTestMe GetCertified.
Prerequisites #
REST API can be enabled on request. For more information, contact the YouTestMe team at sales@youtestme.com.
As a part of the REST API delivery, you should receive the following links that you should use to build the integrations with YouTestMe:
- Link to the REST API documentation.
- Base URL of the REST API endpoints.
Useful links and tutorials #
- Exploring YouTestMe REST API documentation – This video demonstrates how to use YouTestMe REST API documentation to explore the API capabilities and try available endpoints. Also, it explains how to log in to REST API with the Basic and JWT Token authorization.
- How to Use YouTestMe Webhooks – This video demonstrates how to register to the YouTestMe Webhooks to receive updates about specific events in the YouTestMe application.
- YouTestMe integration scenarios and approaches – On this page, you can see the different approaches and scenarios for integrating YouTestMe with other applications, that can help you build your integrations with YouTestMe.
YouTestMe REST API documentation #
To access the REST API documentation, visit the documentation link provided by the YouTestMe team after your dedicated REST API is enabled.
In the YouTestMe REST API documentation, you can find the detailed specification of the REST API endpoints, and CURL examples with the sample request parameters. Also, you can modify sample request parameters and try to execute them before implementing the API calls in your code.
This chapter explains how to create a user using the YouTestMe REST API documentation:
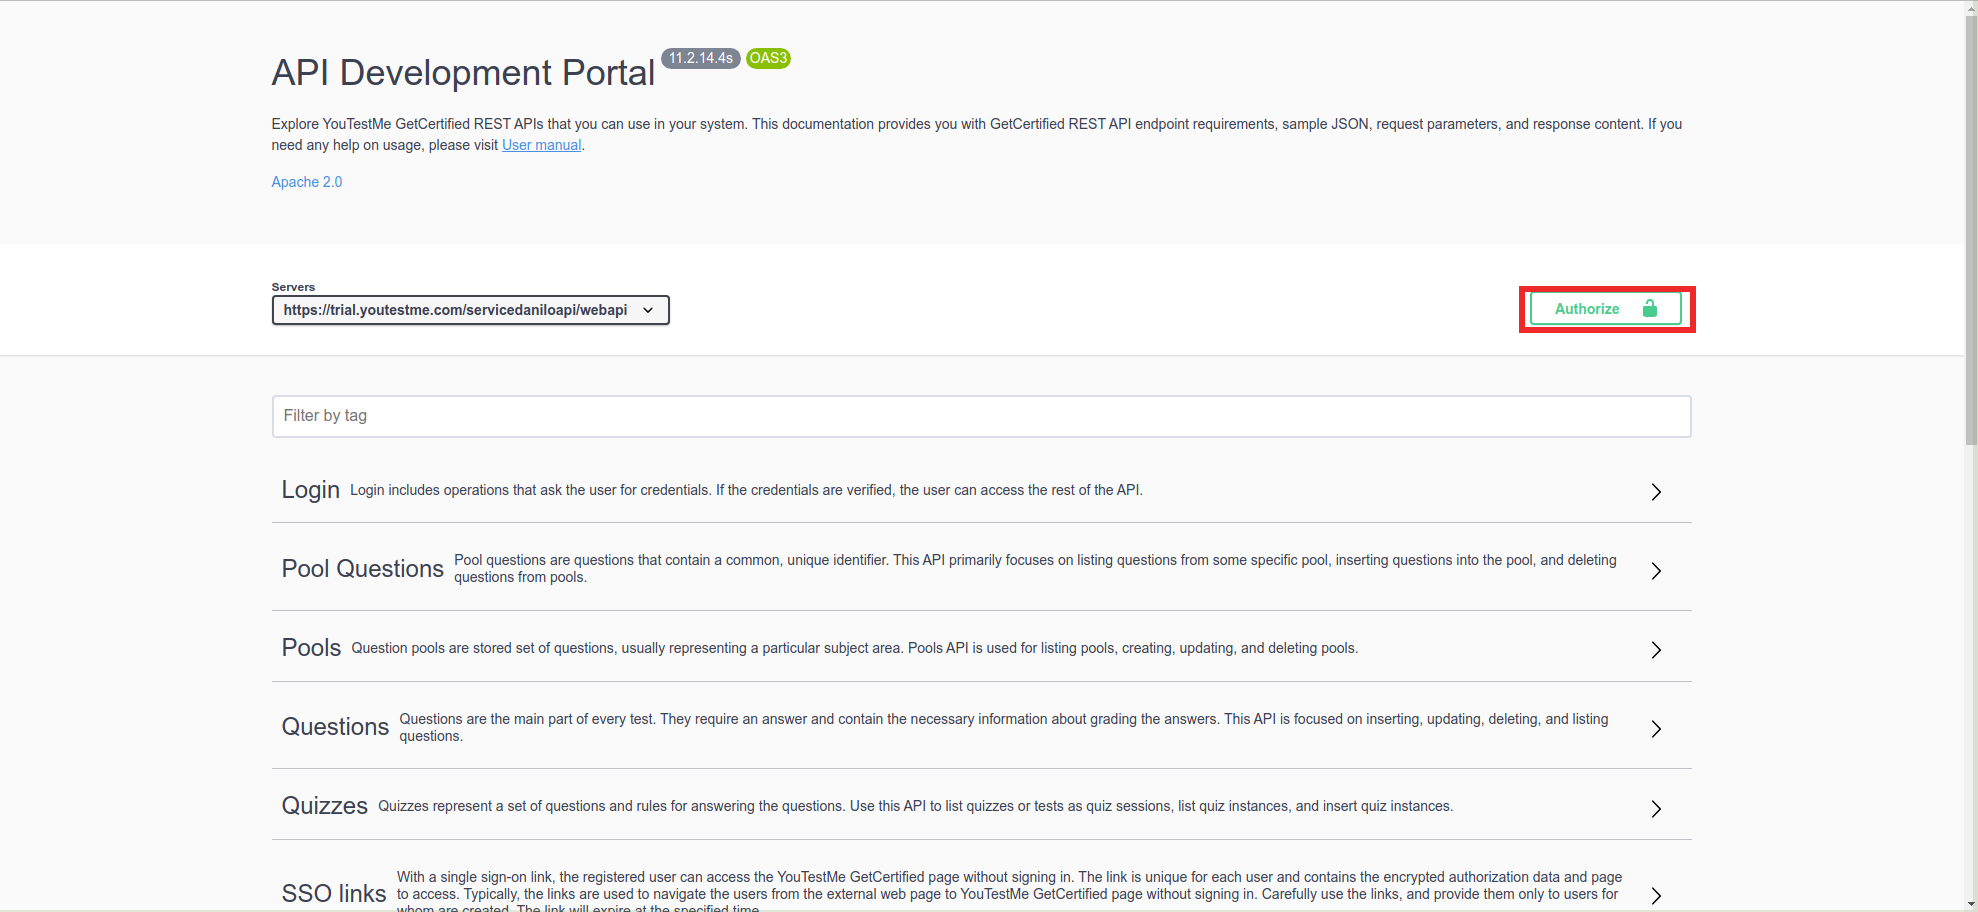
The first step is the API authorization. You need to connect one YouTestMe account with the Administrator role and authorize it with the Basic Auth to get the JWT token and forward it as a header parameter to protected API endpoints.
To authorize the Administrator account, click the “Authorize” button to open the login dialog.
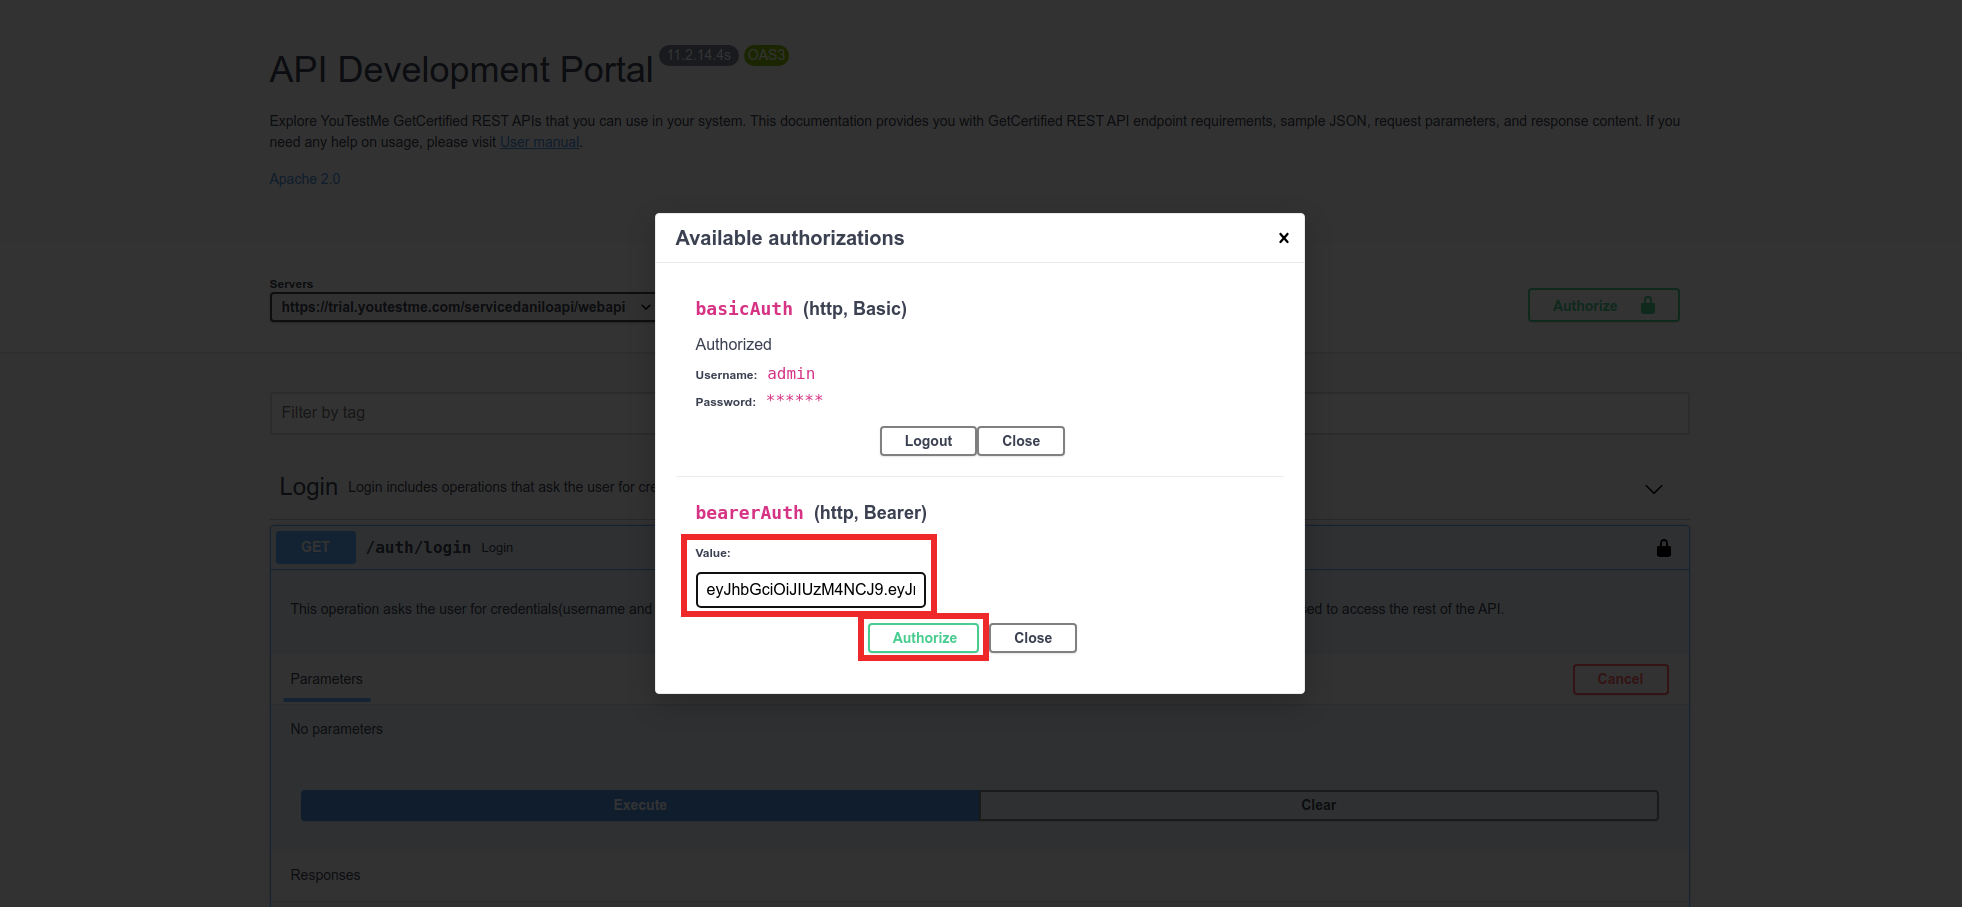
Enter the administrator’s account credentials in the basicAuth fields and click “Authorize”.

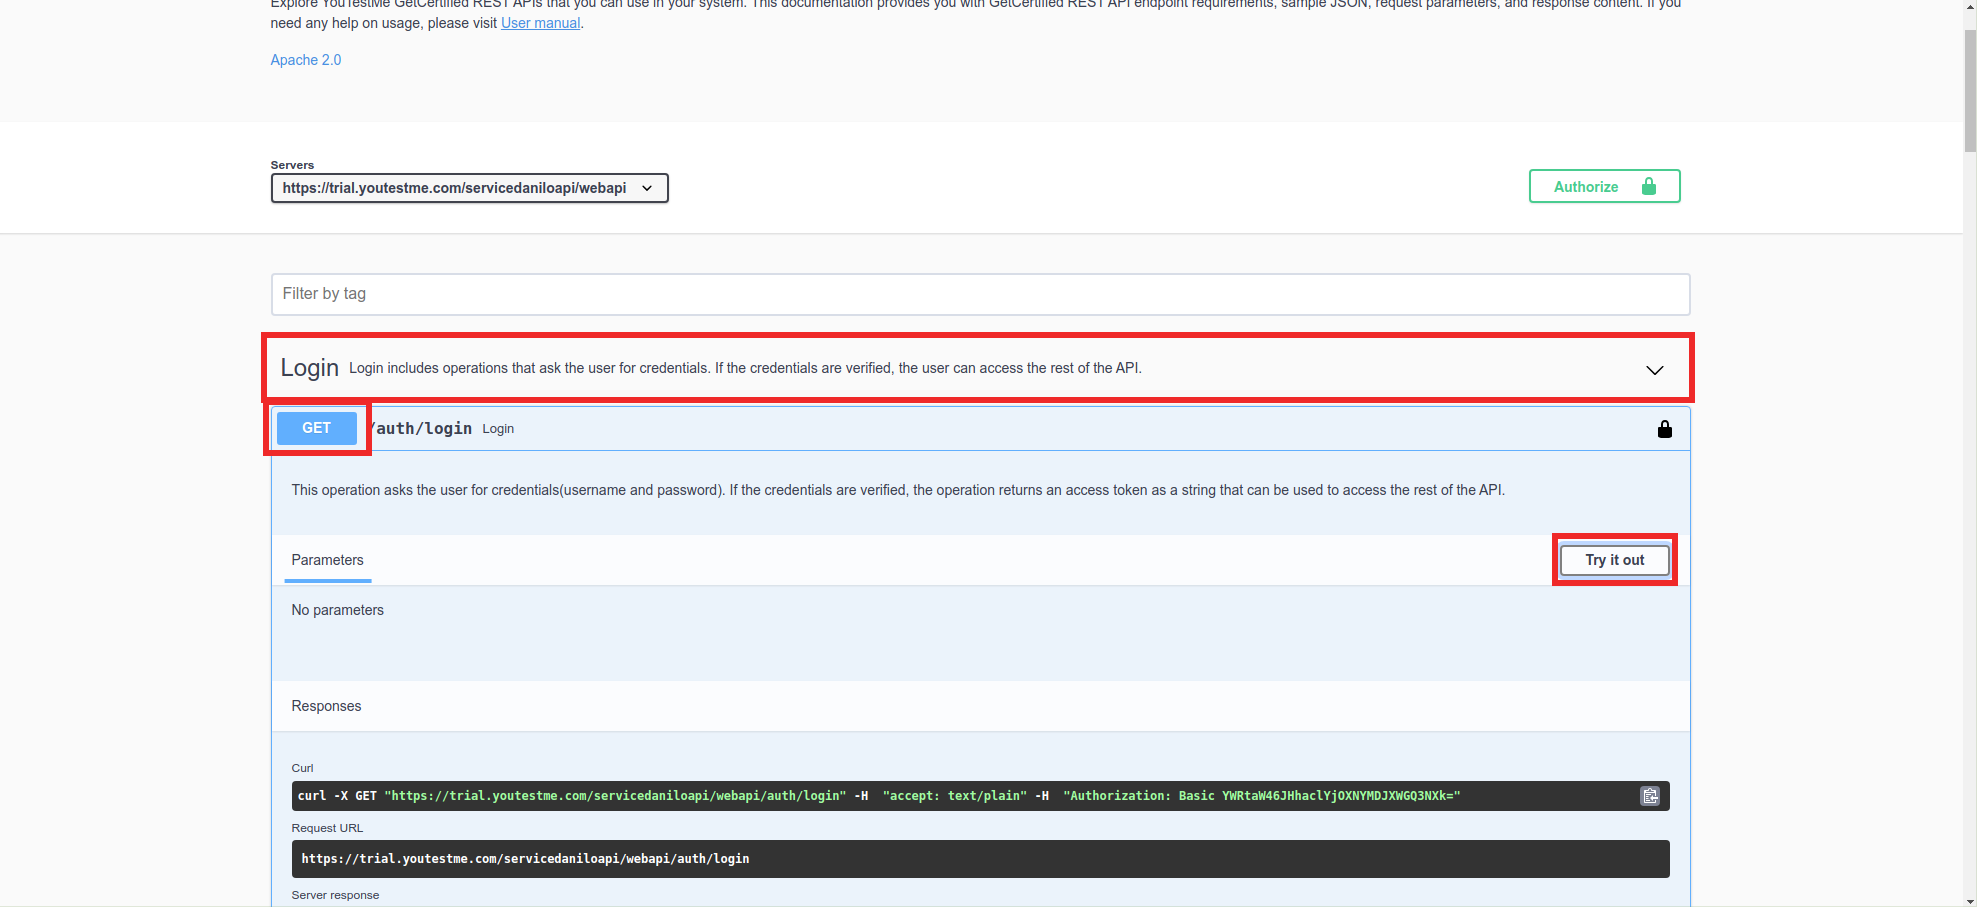
To proceed, please close the current dialogue and navigate to the “Login” section. Once you have expanded this section, select the “GET” button to access the authorization token generation area. To send the Basic Auth request and get the JWT token, click on the “Try it out” button.
Click the “Execute” button and copy the JWT token from the “Response body” field.

After that, click the “Authorize” button again, and in the bearerAuth section, enter the previously copied JWT token in the “Value” field and click the “Authorize” button.
Now you can create, delete, get, and update data in the application. Example for user input: we find the “Users” section and click on it. When that section opens, we click on the “POST” button and then on the “Try it out” button.

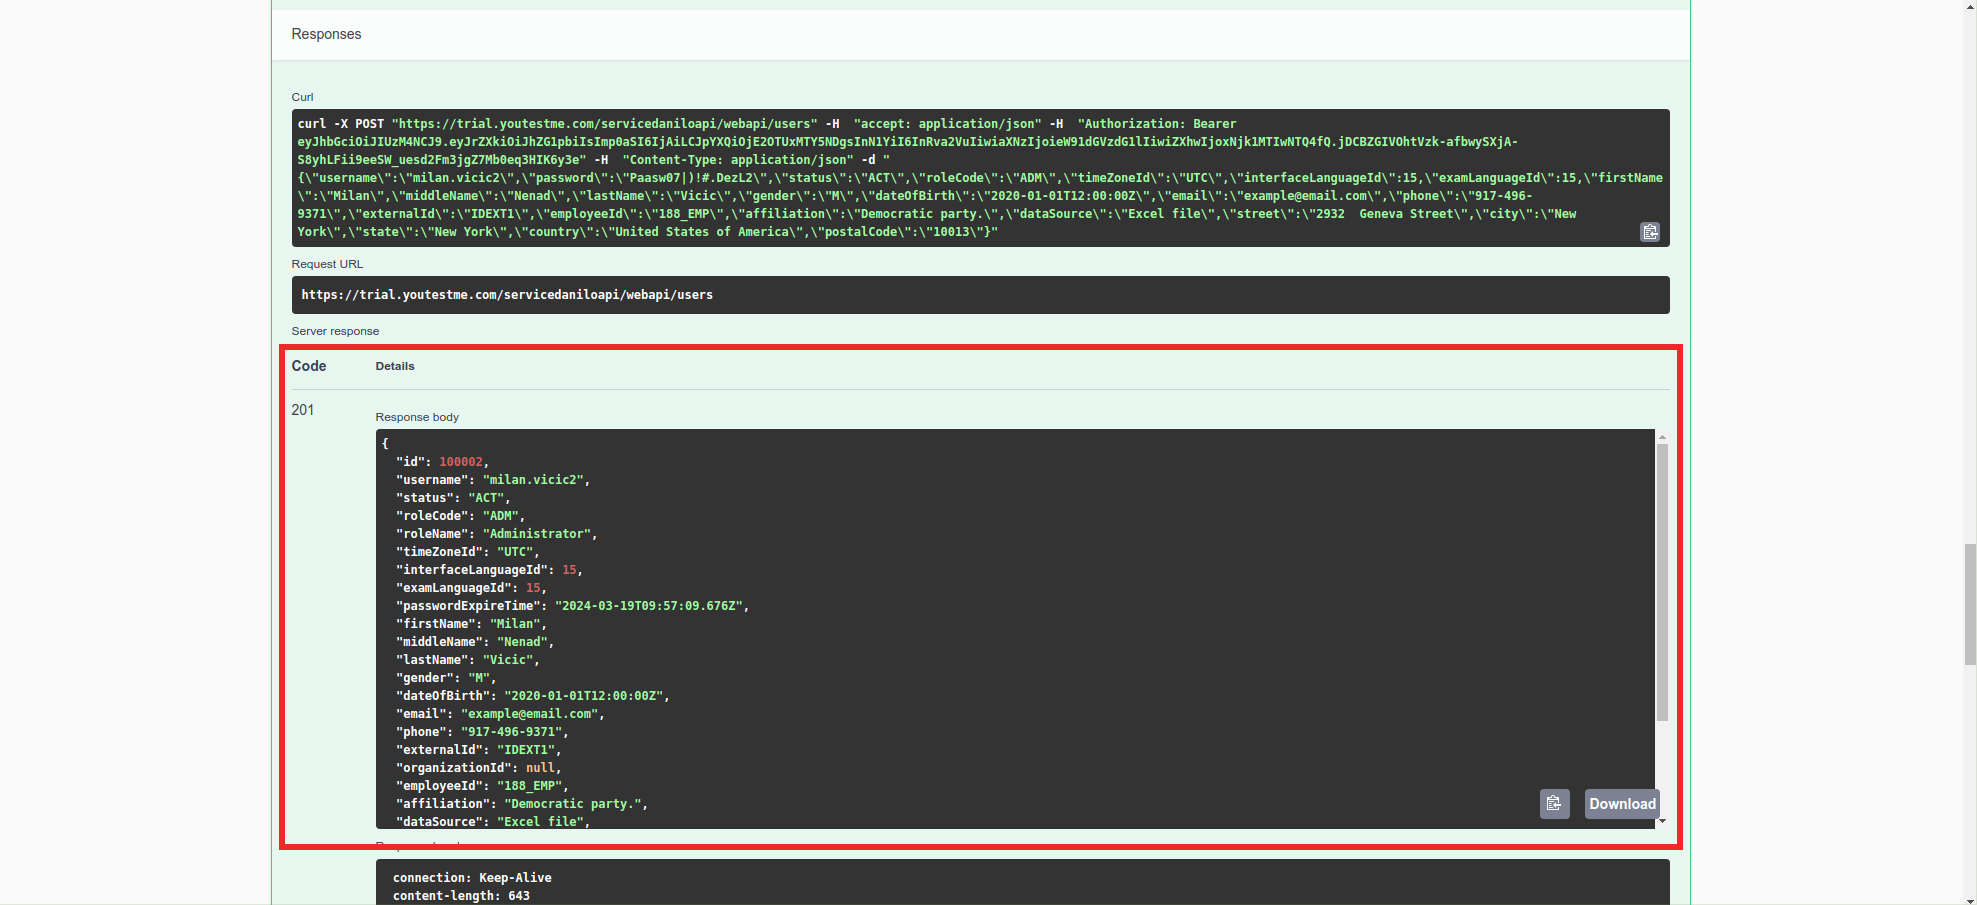
In the “response body” field, replace the current data with the desired data, then click “Execute”.

When the user is created, you will get a 201 message in the section below if the entry was successful.